We talk a lot about shingles and membranes, but here’s the quiet hero of a dry home: flashing. When folks ask us about roof flashing benefits, we point to the simple truth, most leaks start at transitions, not “out in the field” of the roof. Flashing manages those transitions.
Why is roof flashing so important? It plays a crucial role in preventing water damage and leaks by sealing around roof features and vulnerable areas, ensuring your home stays protected.
Flashing is especially important for protecting vulnerable areas of the roof, such as intersections, protrusions, and roof features like chimneys and electrical masts, and points where different surfaces meet, which are most susceptible to leaks and water intrusion.
As the rainy season builds in Seattle and across the Puget Sound, wind‑driven rain tests every joint, wall, and penetration. Good flashing keeps the water moving where it should go, down and out, so your roof lasts longer and your attic stays clean and mold-free. It sounds small: it isn’t.
What Roof Flashing Is and Why It Matters
How Flashing Controls Water
Flashing is the thin, durable barrier, usually metal or flexible membrane, that bridges roof surfaces and vertical features, then steers water away from joints. Choosing the right flashing material is crucial for effective waterproofing, as it ensures durability and proper water diversion at vulnerable roof areas. Flashing is specifically designed to direct water away from vulnerable areas, such as seams and intersections, to prevent leaks and water penetration. Think of it as the gutter’s precision cousin, tucked behind siding and under shingles.
We layer flashing into the roofing system so water follows gravity, overlaps, and capillary breaks. Different flashing materials, such as steel, aluminum, copper, or rubber, are selected based on the specific needs and environmental conditions of each roof area to ensure long-lasting protection. With correct sequencing, water flows onto, not behind, each piece. Done wrong? Capillary action and wind pressure push water uphill and sideways (yes, sideways in a storm), causing slow leaks that you only notice after the drywall stains. In addition to preventing water intrusion, properly installed flashing also helps prevent air infiltration, which can reduce energy efficiency and contribute to moisture problems.
The International Residential Code requires flashing at critical transitions for a reason. See IRC 2021, Section R903.2 on flashing locations for the core idea: protect penetrations and roof-wall junctions, and do it with proper laps and sealants.
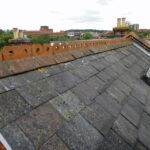
Common Locations It Protects
We rely on flashing at chimneys, skylights, roof-to-wall intersections, sidewalls and headwalls, valleys, and eaves. Roof valleys are critical intersections where large volumes of water are channeled, so specialized flashing is essential in these areas to prevent leaks. Drip edges defend the perimeter. Step and counter flashing team up along sidewalls. Kickout flashing dumps wall-shedding water into the gutter instead of behind the siding.
On homes around Tacoma or Bellevue, we also see vent stacks, satellite mounts (sigh), and complex dormers. Flashing is also critical around vent pipe, exhaust pipes, and the electrical service entrance mast, as well as other roof penetrations. Specialized components like vent pipe flashing and electrical service entrance mast flashings are used to create weatherproof seals at these locations and prevent water intrusion. Every extra edge is another place flashing has to carry the load.
Key Benefits You’ll Notice Over Time
Leak Prevention at High-Risk Transitions
The number one roof flashing benefit: fewer leaks at the places that actually leak, significantly reducing the risk of roof leaks at these vulnerable transitions. Flashing acts as a critical barrier that shields the roof deck from water damage at these transition points, preventing moisture from penetrating the underlying structure. Shingle fields rarely fail first, intersections do. Smart detailing (step + counter flashing, proper headwall apron, sealed pipe boots) chokes off intrusion at the exact points wind and water attack. Achieving a proper seal at all flashing locations is essential to ensure waterproof protection and prevent leaks.
FEMA’s coastal construction guidance even isolates flashing at roof‑wall intersections as a must-have to prevent water infiltration during severe weather events. The principle’s the same here in the PNW, where atmospheric rivers can hammer a west-facing wall for hours.
Reduced Rot, Mold, and Interior Damage
Keep water out, and you starve rot and mold of their fuel. That’s not abstract. Wet sheathing delaminates. Water damage from leaks can lead to costly repairs and compromise the integrity of the roof structure. Regularly maintaining flashing on your existing roof is crucial to prevent rot, mold, and interior damage. Rafters soften. Insulation clumps and loses R‑value. And the attic turns musty, which nobody wants. The CDC recommends keeping indoor spaces dry and humidity under roughly 50% to curb mold growth.
When flashing works, your framing stays dry and your paint doesn’t bubble. Over time, that’s real money saved, fewer drywall repairs, no surprise ceiling spots after a squall, and a roof structure that actually reaches its service life. By preventing water intrusion, flashing also helps maintain the structural integrity of the entire roofing system.
Where Flashing Adds the Most Value
Step, Counter, and Apron Flashing
At sidewalls, we install step flashing, small L‑shaped pieces, so each course overlaps the next like shingles. This ties the wall’s weather-resistive barrier (WRB) to the roof’s surface. Step flashing is specifically installed where the roof plane meets vertical walls to prevent water ingress at these intersection points. Then we add counter flashing (let into masonry or tucked behind siding) so water can’t sneak behind the steps. The duo is simple, clean, and proven.
At headwalls, an apron flashing spans the joint where the roof runs into a vertical wall. It should sit beneath the siding or stucco and over the shingles, never the other way around. We also integrate peel‑and‑stick underlayment at these terminations for a second line of defense.
Valley, Drip Edge, and Kickout Flashing
Valleys concentrate water volume, so they deserve heavier‑gauge metal, correct width, and honest-to-goodness ribbing or W‑valley profiles where appropriate. Metal flashing is essential in roof valleys to provide long-lasting protection against water intrusion and ensure a watertight seal. Proper valley and eave flashing also helps prevent damage caused by ice dams during winter, which can lead to leaks and moisture issues if not addressed. Fasteners go outside the valley centerline to avoid punctures where water is deepest.
Drip edge keeps roof edges from wicking water back into the fascia and sheathing. Continuous flashing, also known as apron flashing, is installed at the bottom of sloped roofs to direct water away from vertical walls and into gutters, further preventing water infiltration. It sounds boring, but we’ve seen rot spread a foot or more along eaves when drip edge was omitted.
Kickout flashing is a small diverter where a roof meets a wall above a gutter. Without it, water sluices behind siding and rots sheathing, especially on stucco and fiber‑cement claddings. The Building America Solution Center has a clear guide on proper kickout geometry and placement.
Materials and Installation Practices That Make the Difference
Choosing the Right Metal or Membrane
We typically use galvanized steel, aluminum, or copper. The choice of flashing depends on the different types of roof and their specific requirements. Each has pros and quirks:
- Galvanized steel: strong and affordable, but watch cut edges and corrosion near salt air. Coastal homes around Westport? Consider upgrades.
- Aluminum: light and corrosion‑resistant, though it can react with alkaline masonry unless isolated. Paint finishes matter.
- Copper: premium, long‑lived, and solderable, great for complex chimneys, but pricier and visually distinct as it patinas.
Copper roof flashing and copper flashing are especially valued for their exceptional durability, high corrosion resistance, and ability to withstand harsh weather conditions and UV exposure. These properties make copper an excellent choice for regions with severe climates or salt exposure, ensuring long-term protection and minimal maintenance.
Roof flashings are specifically designed for metal roofs, flat roofs, and sloped roofs. These materials are selected for their ability to withstand harsh weather conditions and provide reliable protection against water infiltration. While steel is most common, other materials such as lead, rubber, or plastic may be used depending on the project or specific needs.
Flexible options like butyl‑based flashing tapes or EPDM boots complement metal, not replace it. Aluminum or EPDM rubber are commonly used for their durability and ability to create weatherproof seals around roof penetrations. For low‑slope transitions or skylights, we’ll often combine a metal counter with a self‑adhered membrane to seal fasteners and corners.
Proper Sequencing, Overlaps, and Sealants
There’s craft in the stack-up. We shingle everything in the direction of water flow: WRB over step flashing, step flashing over shingles, counter flashing over step, siding over counter. Overlaps matter, typical minimum laps of 3 inches, more in high‑exposure zones. These practices are essential to achieve a watertight seal at all flashing joints.
Proper installation is critical to ensure that flashing is installed correctly, creating a weatherproof seal that delivers superior protection and resists extreme temperatures. Flashing must be properly installed to guarantee long-term durability and performance.
We also avoid blind reliance on caulk. Sealants are backups, not the primary water control. Nails stay out of valley centers and off the vertical legs of flashing where they’d introduce holes. And yes, kickout flashing gets integrated under the WRB, then empties cleanly into the gutter, no “close enough” angles that spit water at the wall during a downpour.
For additional background on best practices, NRCA’s guidance on flashings is a solid reference point for terminology and approach.
Maintenance, Repairs, and Cost Considerations
Signs of Flashing Failure and When to Act
We advise homeowners to walk the exterior after big winds or heavy rain. Look for:
- Stains on ceilings near walls or chimneys.
- Rust streaks at step flashing lines.
- Missing kickouts or water trails on siding.
- Soft fascia at eaves (drip edge missing or short).
- Lifted shingles at valleys or headwalls.
Inside the attic, daylight at penetrations, damp sheathing, or a musty smell are your early alarms. In Western Washington’s wet months, even small openings can admit enough moisture to spark mold within weeks.
Kick this up a notch if your home faces prevailing storms. The National Weather Service data show Seattle gets long stretches of light rain punctuated by serious wind‑driven events, those are the ones that find tiny mistakes. If you see anything odd, don’t wait until spring. Delaying flashing repairs can result in more extensive water damage and lead to costly repairs down the line.
Repair vs. Replacement and Expected Costs
If the roof is sound and the failure is localized, say, a cracked pipe boot or a missing kickout, we can usually repair just that flashing assembly. Chimney flashing that wasn’t counter‑flashed properly may need rework into the mortar joints: that’s a replacement, not a patch.
Scope drives cost: access, steepness, material choice, and whether siding or masonry needs surgical removal. National averages for roof repairs often land from a few hundred dollars to a few thousand depending on complexity. Chimney flashing and complex valleys trend higher because of labor and detailing.
Conclusion
When we talk roof flashing benefits, we’re really talking about roof longevity. Flashing is the control joint of the entire water‑shedding system, and it’s where good roofs prove themselves during the first real storm.
Prioritize proper materials, sequencing, and those small details, kickouts, drip edges, counter flashing, and you’ll prevent leaks before they even think about starting. Regular inspection and maintenance are key to ensuring the optimal performance of your roof flashing system. If you’re planning a re‑roof or chasing a mystery stain, let’s make the transitions bulletproof. Your future self (and your drywall) will thank us.
Frequently Asked Questions
What is roof flashing and why does it matter?
Roof flashing is thin metal or membrane installed where roofs meet walls, chimneys, skylights, and other penetrations. Proper sequencing and overlaps steer water onto, not behind, the roof system, defeating capillary action and wind-driven rain. Understanding roof flashing benefits explains why codes require it: fewer leaks, cleaner attics, and longer roof life. Roof flashing important for preventing water intrusion, protecting against moisture damage, and avoiding costly repairs.
What are the top roof flashing benefits for preventing leaks and extending roof life?
Top roof flashing benefits include stopping leaks at high-risk transitions, reducing rot and mold by keeping sheathing and framing dry, and helping your roof reach its service life. Details like step and counter flashing, headwall aprons, drip edges, and kickout diverters work together as part of a comprehensive flashing system designed to prevent leaks and extend the life of your roof by directing water away from vulnerable areas.
Where is flashing most important on a roof?
Flashing matters most at intersections and penetrations: chimneys, skylights, valleys, and roof-to-wall joints. Flashing is especially critical where the roof intersects with vertical walls, chimneys, and other structures, as these roof intersects are common points for water intrusion. Use step flashing with counter flashing along sidewalls, an apron at headwalls, heavier-gauge metal in valleys, and drip edge at eaves. Kickout flashing is crucial where a roof meets a wall above a gutter, diverting water into the gutter.
What signs of flashing failure should I look for after storms?
After heavy wind or rain, check for ceiling stains near walls or chimneys, rust streaks along step flashing lines, water trails on siding, missing kickouts, soft or rotted fascia at eaves, and lifted shingles at valleys or headwalls. In the attic, look for daylight, damp sheathing, or musty odors—act quickly if found. Ignoring flashing failure can allow water intrusion, which may result in structural damage to the roof and home.
How often should I inspect flashing to preserve roof flashing benefits, and can I DIY it?
Inspect flashing twice a year—spring and fall—and after major storms to preserve roof flashing benefits. From the ground, use binoculars; in the attic, check for moisture. DIY only if you’re experienced and it’s low-slope, low risk. Avoid prying shingles. Hire a pro for steep roofs, chimneys, stucco, or complex transitions. Professional expertise is especially important for complex roof installations to ensure proper flashing and leak prevention.
How long do roof flashing benefits last before materials need replacement?
Roof flashing benefits endure as long as materials and detailing hold up: galvanized steel often lasts 15–25 years (shorter near salt air), aluminum 20–30+, and copper 50+ with proper care. The lifespan of flashing also depends on the quality of the roofing material and installation practices, as certain roofing materials can enhance the durability and water resistance of flashing. Rubber boots and tapes may need replacement in 10–20 years. Replace during re-roofing or at the first signs of failure.
Oleksandr Kovalyov is a Ukraine-based roofer and multipurpose builder specializing in residential and commercial roofing installations, repairs, and sustainable construction practices.
Recent Post