If water is sneaking in around a chimney, vent, or wall meet-up, odds are the flashing’s to blame. Learning how to repair roof flashing isn’t glamorous work, but it can save a ceiling, drywall, and a weekend by preventing costly water damage. We’ll walk through how flashing works, how to find the leak (the real one), and the right way to fix common trouble spots so the repair lasts longer than the next Seattle rainstorm.
What Roof Flashing Does And Why It Fails
Flashing is the metal (sometimes rubber or composite) that seals joints where the roof meets something else: chimneys, walls, skylights, valleys, and vent pipes—these are all vulnerable areas that require special attention. Flashing consists of different elements that work together to protect the roof. Its location and position are important for ensuring its effectiveness in directing water away from seams that shingles alone can’t protect. Proper flashing installation and maintenance are essential and crucial for maintaining the integrity and longevity of your roof.
Why does it fail? There are several factors and other factors that contribute to flashing failure. Common issues include cracks, damaged flashing, and compromised areas that allow water to penetrate. It’s important to determine the condition of your flashing to decide if repairs or replacement are needed. Addressing these problems promptly is key to preserving the effectiveness of your roof flashing and preventing costly water damage.
Thermal Movement And Age
Metal expands and contracts. Over years, fasteners loosen, seams open, and brittle sealants crack. Rubber pipe boots dry out and split, sun and ozone are not kind.
Improper Installation
We see this a lot on older homes and quick flips. Missing step flashing, chimney counterflashing not let into the mortar (just smeared with mastic), or continuous “L” flashing used where step flashing should go. Shortcuts invite leaks.
Corrosion And Debris
Galvanized steel eventually rusts, especially near salt air or mossy, damp shingles. Debris builds dams, water backs up, and capillary action sneaks it under laps.
Wind-Driven Rain And Ice
In the Puget Sound area, sideways rain happens. And on the east side of the Cascades, freeze–thaw and wind load lift edges. Water finds even tiny gaps.
Code note: the International Residential Code requires flashing at all wall and roof intersections and around penetrations (IRC R903). See the current language here: https://codes.iccsafe.org/content/IRC2021P2/chapter-9-roof-assemblies#IRC2021P2_Ch09_SecR903.
Safety, Tools, And Materials
Before we touch a shingle, we deal with safety. Falls aren’t worth the risk. Using the right equipment for roof flashing repair is essential to ensure both safety and effective results.
Tools You’ll Need:
- Ladder
- Hammer
- Pry bar
- Utility knife
- Caulking gun
- Safety goggles (to protect your eyes from debris and hazardous materials)
Materials:
- Roofing cement
- Flashing
- Roofing nails
- Sealant
Before cutting or installing any materials, accurately measure the flashing and roof areas to ensure a proper fit and watertight seal. Always follow the manufacturer’s instructions when applying roofing cement, sealants, or membranes to achieve the best and most durable repair.
Safety First
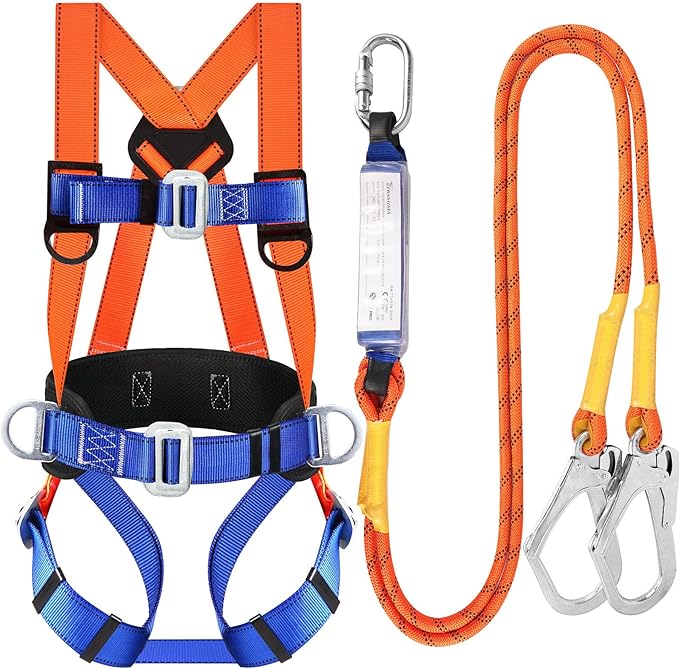
Use a stable ladder set at the 4:1 rule with the rails extending at least 3 feet above the eave. On slopes above a simple walkable pitch, we tie off with a full-body harness, roof anchor, and lanyard. OSHA’s fall protection standard (29 CFR 1926.501) lays it out: https://www.osha.gov/laws-regs/regulations/standardnumber/1926/1926.501. Wet moss in Western Washington is slick as soap: if the roof’s green, we clean or we don’t climb.
Tools We Actually Use
- Flat pry bar and a shingle removal bar (a shingle eater helps)
- Utility knife with hook blades
- Hammer or roofing nailer, plus a drill/driver
- Caulk gun and a margin trowel
- Tin snips and aviation snips
- Angle grinder with a diamond tuckpoint blade (for chimney mortar joints)
- Chalk line, tape, and a moisture meter for diagnosis
Materials That Hold Up
We prefer 26-gauge galvanized or aluminum step flashing (5″×7″ or 5″×8″ for most shingles). Stainless near coastal areas. For sealants: polyurethane or tripolymer roof sealant (e.g., Geocel/NP1), not just roofing cement. Butyl flashing tape and self-adhered membrane (ice-and-water shield) around penetrations. For pipe penetrations: UV-stable rubber boots or lead flashings. Keep fasteners hot-dipped galvanized or stainless ring-shank. On metal roofs, use butyl-sealed rivets and high-temp silicone at manufacturer-specified points.
Manufacturer resources like GAF’s flashing basics are worth a skim: https://www.gaf.com/en-us/roofing-resources/residential-roofing/flashings
Diagnosing The Leak Source
Flashing leaks love to mislead. It’s important to notice and watch for signs of flashing problems, such as stains, rust, or visible gaps. Water can enter ten feet upslope and show up over your kitchen, leading to water intrusion, water infiltration, and even damage to ceilings. When inspecting the attic, check for any evidence of water intrusion or stains on ceilings. During exterior inspection, look for compromised areas or a damaged roof, which may indicate flashing failure. If you notice these signs, determine if new flashing is needed to fix a leaky roof. We slow down and prove the source.
Attic Recon
On a dry day, check the attic with a headlamp. We follow stains back to their uphill origin. Look for rusted nail tips, dark trails on rafters, wet sheathing around chimneys, and daylight around pipes or skylights. A moisture meter helps separate old discoloration from active moisture.
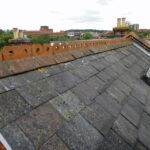
Exterior Check, Shingles And Flashings
Outside, we look for cracked pipe boots, loose counterflashing, gaps in step flashing, popped nails, or rusted valley metal. Tap suspect spots: soft sheathing hints at chronic leaks. Also check siding above roof-to-wall joints, missing kickout flashing leaves telltale streaks on the wall.
Controlled Hose Test
With one person inside and one outside, we wet the roof starting low and moving upslope in sections, five minutes per area. No direct pressure at joints, just rain simulation. When the watcher calls “drip,” we’ve found the zone.
Not Every Drip Is A Leak
Sometimes it’s condensation from poor ventilation. Warm indoor air meets a cold roof deck and rains inside. The U.S. Department of Energy notes that proper ventilation and air sealing reduce moisture issues in attics: https://www.energy.gov/energysaver/ventilation. If it’s sweating, flashing won’t fix it, air seal and ventilate.
Step-By-Step: Repairing Common Flashing Problems
Repairs vary by detail. We’ll cover the big six we’re called for most, including common trouble spots like vents where flashing issues often occur. Before starting, ensure that flashing is properly installed and secured in the correct position to create a tight seal and prevent water infiltration.
Take your time lifting shingles: save as many intact courses as you can. When repairing, use materials specifically designed for flashing and sealing, such as metal flashing for waterproofing around chimneys, valleys, and vents. Press all materials firmly in place and use tar to seal any gaps or damaged areas, ensuring a watertight barrier.
Choose the right products for your roofing needs to maximize the effectiveness of your repair. After checking that all components are installed correctly and securely, proceed with completing the repair to maintain the integrity of your roof.
Pipe Boot Replacement (Asphalt Shingle Roof)
- Carefully lift the shingles around the boot with a flat bar. Remove nails from the upper and side flanges: leave lower nails if they’re covered and sound.
- Slide the old boot up and off the pipe. If it’s lead, cut and peel. Inspect the sheathing. If the underlayment is torn, patch with self-adhered membrane.
- Dry-fit the new boot. The top and sides go under shingles: the bottom flange sits on top. Trim shingles as needed for a flat lay.
- Nail the flange high, under shingle coverage. Seal the uphill flange with a thin bead of polyurethane and bed the shingle in. Do not face-seal exposed edges as your primary defense, it’s a backup, not the system.
Chimney Flashing And Counterflashing
- Remove loose mortar and any surface-smeared metal. Good counterflashing is cut-and-set into mortar joints (a reglet), not glued to brick faces.
- Grind 3/4″ deep kerfs into mortar joints. Replace or reset step flashing around the chimney, shingle by shingle, lapping each piece at least 2″ and extending up the chimney 4″ or per code.
- Install counterflashing by inserting bent metal into the kerf and bending the “kick” to cover step flashing by 2″. Fasten in the joint, then tuck-point with exterior mortar or butyl-backed reglet seal.
- At the uphill side, install a cricket (saddle) on chimneys wider than 30″ to split flow. Without a cricket in heavy rain, water ponds and wins.
Step Flashing At Sidewalls
- Strip shingles in the affected area. If someone used continuous “L” flashing, we replace with individual steps.
- Starting at the eave, place the first step flashing over the underlayment and on top of the starter shingle. Nail to the deck high and away from the wall.
- Each new shingle covers the leg of the step below. Lap steps a minimum of 2″. Counterflashing or siding must cover the vertical leg, never leave step flashing exposed.
- Add kickout flashing at the bottom to dump water into the gutter, not behind the siding. This tiny piece prevents major rot.
Valley Flashing Touch-Up Or Replacement
- For open valleys, lift shingles and inspect the metal. Pinholes or rust lines can be temporarily bridged with butyl tape and a membrane patch under shingle laps, but if corrosion is widespread, replace the valley metal.
- When replacing, snap chalk lines to maintain a clean open valley. Ensure a centerline no-nail zone. Hemmed edges help stop capillary creep.
Skylight Leaks
- First, check the weep channels on the skylight frame, clogged weeps mimic flashing leaks.
- If the factory flashing kit is missing or piecemealed, remove shingles and install the manufacturer’s kit in sequence: sill, step, then head flashing. Bed the sill with self-adhered membrane.
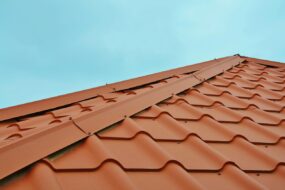
Metal Roof Notes (Quick But Important)
Metal panels move. We use pipe boots designed for metal (flexible EPDM with ribbed base), sealed with butyl and riveted. Replace oxidized fasteners with oversized, gasketed screws. Sealants must be high-temp and compatible with the coating. And don’t over-torque, crushed washers leak later.
If you want more manufacturer detail, GAF’s overview page is a solid primer and links out to step-by-steps: https://www.gaf.com/en-us/roofing-resources/residential-roofing/flashings.
When To Call A Professional And What It Costs
Some repairs are weekend doable. Others, chimney reglet cuts, steep-slope work, hidden sheathing rot, are a call-the-pro situation. For complex or extensive repairs, seeking professional assistance is crucial to ensure proper installation and long-term durability. If you’re not fully comfortable with roof safety or masonry work, we don’t push it. The effectiveness of professional repairs far exceeds most DIY fixes, providing a more reliable and lasting solution for your roofing needs.
Typical pricing in our market, just to calibrate:
- Pipe boot replacement: $200–$500 per penetration.
- Chimney reflashing with counterflashing cut into mortar: $1,000–$2,500 (add a cricket and it’s more).
- Step flashing at a wall: $600–$1,200 depending on length and siding.
- Valley metal replacement: $500–$1,200 per valley.
- Leak diagnosis/service call: $150–$300, often credited to the repair.
Prevention And Maintenance
The cheapest repair is the one you never need. Flashing doesn’t demand much, but it does like attention. It’s important to watch for signs of flashing issues and notice any problems early, as catching these signs can prevent costly repairs.Regularly check all elements of the flashing system, especially in vulnerable areas like chimneys, vents, and skylights. Consistent maintenance helps preserve the longevity and integrity of your roof, preventing water damage and ensuring your home stays protected.
Seasonal Checks
Before the fall storms and again in spring, scan penetrations and wall joints. Look for cracked sealant beads, lifted shingles at step flashers, or rust stains in valleys. Clean gutters: overflows drown sidewall flashing.
Keep Water Moving
Kickout flashing at the base of roof-to-wall intersections is a must. If your siding shows stains right below the roofline, you’re probably missing one. Also, maintain adequate attic ventilation to limit condensation that masquerades as leaks. The DOE’s guidance on ventilation is a quick read: https://www.energy.gov/energysaver/ventilation.
Respect The System
Avoid surface “goop jobs.” Roofing cement alone ages fast, especially in sun. If we use sealant, it’s as part of a shingle-and-metal overlap system, not instead of one. Replace brittle pipe boots every 10–15 years. In moss-prone neighborhoods, from Ballard to Bremerton, soft-wash and zinc control strips help keep water pathways open.
Conclusion
Learning how to repair roof flashing comes down to two things: diagnose the true entry point, then rebuild the metal-and-shingle overlaps the right way. No heroics, just careful steps. Whether it’s a $30 pipe boot or full chimney reflashing, doing it right once beats patching twice. And if the slope, height, or masonry work isn’t in our comfort zone, bringing in a pro is not a defeat, it’s how we keep the rain outside where it belongs.
Roof Flashing Repair: Frequently Asked Questions
How to repair roof flashing around a chimney?
Remove any smeared-on metal or mastic. Grind 3/4-inch kerfs (reglets) into mortar joints, then re-shingle with individual step flashing lapped 2 inches and turned up the chimney 4 inches. Insert counterflashing into the reglets to cover the steps, fasten in the joints, and tuck-point. Add a cricket for chimneys wider than 30 inches.
How to repair roof flashing on a vent pipe (pipe boot)?
Gently lift surrounding shingles and pull nails from the upper and side flanges. Slide the old boot off, patch torn underlayment with self-adhered membrane, and dry-fit. Install the new boot with top and sides under shingles and the bottom flange exposed. Nail high under shingle coverage and seal the uphill flange with polyurethane—avoid exposed caulk as the primary defense.
How do I find the real source of a roof flashing leak?
Start in the attic: trace stains upslope, check wet sheathing and rusted nail tips, and confirm with a moisture meter. Outside, inspect cracked boots, loose counterflashing, and missing step flashing. Run a controlled hose test from low to high. When learning how to repair roof flashing, also rule out attic condensation with better air sealing and ventilation.
Do I need kickout flashing at roof-to-wall intersections?
Yes. Kickout flashing at the base of roof-to-wall intersections diverts runoff into the gutter instead of behind siding. Missing kickouts often leave dirty streaks or rot on the wall below the roofline. Installing a properly sized kickout prevents hidden damage and aligns with common code and manufacturer requirements.
How long does roof flashing last, and which material should I choose?
Service life varies by material and exposure. Galvanized steel typically lasts 15–25 years, aluminum 20–30, and copper or stainless 50+ with proper installation. Rubber pipe boots often crack in 10–15 years. In coastal climates, choose stainless or copper. Regular inspections and timely resealing extend flashing life regardless of material.
Can I repair roof flashing in cold or rainy weather?
For reliable results, work on a dry day above about 40–50°F so sealants cure and membranes adhere. Wet or mossy roofs are unsafe, and cold shingles can crack. If emergency work is unavoidable, use manufacturer-approved cold-weather sealants and treat the fix as temporary until conditions improve and a permanent repair is possible.
Matej Mikula is a Porrentruy-based master roofer specializing in sustainable roofing installations and repairs for residential and commercial properties across Switzerland.
Recent Post