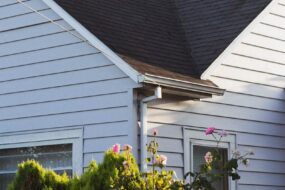
A roof drip edge is a thin metal flashing installed along the edges of the roof that kicks water away from the fascia and into the gutter, protecting the roof deck and the home’s exterior from rot, leaks, and staining. The roof drip edge sits at the eaves and rakes, creates a clean, durable edge for shingles, helps the gutter catch runoff, and, when the drip edge is installed right, reduces issues from wind driven rain and ice dams. In short: the roof drip edge is small, inexpensive, and absolutely essential for a long-lasting roofing system.
What a Drip Edge Does and Why It Matters
How it moves water away
Water’s stubborn. It clings to surfaces and loves to creep under shingles by capillary action or surface tension. A drip edge breaks that cling. The little kick-out bend at the bottom (the “drip” or hem) forces water to drop clear of the fascia instead of curling back toward the wood.
On a rainy day, you can actually see the drip edge working: water runs down the shingles, hits the metal lip, and falls into the gutter instead of sneaking behind it. That simple redirect or directing water protects everything below.
Protecting fascia, decking, and siding
Without a drip edge, runoff can sneak behind the gutter and soak the fascia board. Over time, the paint fails, the wood softens, and you may end up with carpenter ants or mildew and then you’re looking at a fascia replacement plus repainting. Worse, repeated wetting at the edge of the roof deck can swell the OSB/plywood and curl shingles.
A drip edge installation shields these vulnerable spots. It covers the raw edge of the roof sheathing, stiffens the shingle edge in wind, and closes little gaps critters love to test (starlings and squirrels are persistent in the fall, ask any installer).
Helping gutters work better
Gutters aren’t magic troughs. They need help. A correctly sized drip edge (or a gutter apron) makes sure runoff actually lands inside the gutter rather than shooting past it during a downpour. That matters in heavy-rain areas and on steep-slope roofs where water moves fast.
It also reduces those ugly tiger stripes on gutters, those streaks happen when dirty water dribbles off the front because the edge wasn’t directing flow cleanly.
Preventing ice dams and wind-driven rain
A drip edge won’t solve an attic insulation problem, but it’s part of the defense. In cold-climate storms, ice forms at the eaves, water backs up under shingles, and the metal edge helps shed meltwater and block direct capillary intrusion. Building codes pair drip edge with an ice barrier (peel-and-stick membrane) at the eaves for that reason.
During summer squalls, wind pushes rain uphill. The hemmed edge and proper layering with underlayment help keep that wind-driven rain out. The detail is small: the impact during sideways rain is not.
Where a Drip Edge Goes on Your Roof
Eaves vs. rakes
Two edges, two jobs:
- Eaves: the horizontal bottom edge where water drains off. Drip edge here is non-negotiable. It protects the deck edge and ensures water lands in the gutter.
- Rakes: the sloped gable edges. Drip edge here seals the shingle edge against wind and sheds water off the side.
Most roofs need drip edge on both. Some older homes skipped the rakes, and you can often tell because the shingle edges look tired or lifted.
How it interacts with underlayment and gutters
Layering matters. The International Residential Code (IRC) calls for a specific order: at the eaves, the underlayment goes over the drip edge: at the rakes, the underlayment goes under the drip edge. That way, water flows onto the layer below, never behind it.
If gutters are present, a gutter apron (Type F profile) often tucks behind the shingles and over the back of the gutter so runoff can’t sneak behind. Where ice-and-water shield is used, it typically adheres to the deck first, then the drip edge at the eaves, then a narrow strip of membrane laps over the metal to seal nail holes, manufacturers spell this out in their install guides.
Types of Drip Edge Profiles
Type C (L-style)
This is the classic right-angle profile, simple, widely available, and budget-friendly. It has a short vertical face down the fascia and a horizontal flange under the shingles. Many L-styles include a small kick at the bottom to force water to drop.
Best for: straightforward eave and rake edges where gutters sit tight to the fascia and you’re not bridging a big gap.
Type D (T-style or barge)
Think of this like a small, flat “T” sitting on the roof edge, with a pronounced lower kick. It throws water further from the fascia and is great on rakes where wind can push water sideways. Many roofers prefer Type D on gable ends for that extra standoff.
Best for: rakes, windy sites, or where siding needs more protection from splashback.
Type F (gutter apron)
The gutter apron is longer on the roof side and designed to bridge from the shingle edge into the gutter. If the gutter sits slightly forward, Type F ensures water doesn’t sneak behind the gutter hangers.
Best for: homes with K-style or half-round gutters that sit off the fascia a bit, especially after a gutter replacement.
Specialty shapes and when to use them
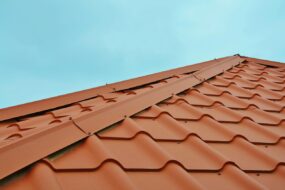
Specialty drip edges include wider flanges for deep overhangs, hemmed safety edges for coastal wind zones, and custom-bent pieces to match thick cedar shakes or tile transitions. In coastal or high-wind areas, a hemmed profile (the bottom edge folded back on itself) resists oil-canning and is safer to handle. For historic homes, copper or prefinished steel in period-correct shapes looks right and lasts decades. T style drip edges and other specialty shapes provide a unique appearance.
Materials, Sizes, and Finishes
Aluminum
Lightweight, corrosion resistant, and easy to cut. Most residential drip edge is aluminum with a factory paint finish. Thickness varies, .019 to .024 inch is common for budget lines, with .027 or .032 inch used where a stiffer edge is preferred. Painted aluminum comes in colors to match fascia and gutters, which keeps the edges clean-looking. Aluminum drip edges are popular.
Pros: affordable, won’t rust, many colors. Cons: can dent: thin stock can wave if not nailed right.
Galvanized steel
A steel drip edge installation is stronger and holds a straighter line, which looks crisp on long rakes. The zinc coating (galvanization) protects against rust: thicker G90 coatings outlast lighter G60 in harsh weather. If you’re near salt air, step up the coating or consider a different metal. Galvanized steel is a common choice for metal drip edges.
Pros: rigid and durable. Cons: if the coating gets damaged or cut edges aren’t sealed, rust can start, especially in coastal climates.
Learn more about zinc coatings from the American Galvanizers Association: https://galvanizeit.org.
Copper and other metals
Copper is the elegant choice, long lifespan, naturally antimicrobial, and it patinas into that green-brown look. It’s pricey and usually reserved for high-end or historic projects. Stainless steel and zinc are other premium options where longevity and aesthetics matter. Vinyl drip edges are an alternative, though less durable.
The Copper Development Association has a helpful roofing FAQ: https://copper.org/applications/architecture/faq/roofing.html
Standard dimensions, overhang, and drip edge size
Typical dimensions: a 2-inch roof-side flange (minimum) and a 1 to 1.5-inch fascia drop with a small kick. Code minimums generally reference a 2-inch roof leg and at least a quarter-inch drop below the deck edge. Many installers favor a slightly wider roof flange (2.5–3 inches) under architectural shingles for better support.
A practical tip: the metal should extend past the fascia enough that water can fall free, usually about 1/2 inch beyond the fascia face. Too short and you’ll get streaks: too long and it may overshoot shallow gutters in light rain. The lower flange helps in directing water away from the fascia.
Codes, Standards, and Manufacturer Rules (in Plain English)
When a drip edge is required
In most U.S. jurisdictions that follow the International Residential Code (IRC), drip edge is required at eaves and gables for asphalt shingles. The requirement has been in the IRC for years and each state or city adopts a version, sometimes with local tweaks or local building codes. Cold-climate regions also require an ice barrier (peel-and-stick) at the eaves plus to the metal edge.
- IRC drip edge section (R905.2.8.5 in recent editions) covers location, overlaps, and thickness.
- Ice barrier requirement lives in IRC R905.1.2 for cold climates with a history of ice buildup.
Public summaries vary by state, but a good plain-language overview appears in many code check guides and municipal building department pages. For background on ice dams and prevention, see U.S. DOE and FEMA:
- DOE Energy Saver on ice dams: https://www.energy.gov/energysaver/ice-dams
- FEMA ice dam fact sheet: https://www.fema.gov/fact-sheet/ice-dams
Basic minimums most codes call for
Here’s the gist, translated to jobsite English:
- Put drip edge at all eaves and rakes (gable ends).
- Overlap pieces at least 2 inches.
- Use metal at least 0.019-inch thick (No. 26 gauge galvanized steel or equivalent).
- Let the metal extend back onto the roof a minimum of 2 inches and drop at least 1/4 inch below the deck edge.
- Layering: underlayment over the drip edge at eaves: underlayment beneath the drip edge at rakes.
Manufacturers (Asphalt Roofing Manufacturers Association, shingle brands) often echo or slightly exceed these rules. When in doubt, follow the stricter instruction, code sets the floor, not the ceiling. The Asphalt Roofing Manufacturers Association has helpful technical bulletins: https://www.asphaltroofing.org
Installation Basics and Common Mistakes
Order of layers at eaves and rakes
Getting the order right prevents leaks:
- Eaves (bottom edge): ice-and-water membrane on the deck first in cold zones: then drip edge: then the underlayment laps over the drip edge. Some manufacturers add a narrow membrane lap over the metal to seal nail holes.
- Rakes (sloped edges): underlayment goes down first: then drip edge on top of it. This locks the underlayment edge down against wind.
It sounds fussy, and it is, but once you’ve seen water track behind an incorrectly layered edge you don’t forget it.
Nailing, overlaps, and sealing
Fasteners: galvanized roofing nails or approved screws, long enough to reach solid deck. Space nails 8–12 inches apart, closer in high-wind zones. Keep nails back from the outer hem so they don’t channel water in.
Overlaps: 2 inches minimum. On steep slopes or wind-prone areas, add a dab of roofing cement at overlaps so water can’t wick in sideways.
Sealing to the gutter: with a gutter apron, the metal should sit over the back flange of the gutter. Where there’s a gap, a bead of polyurethane sealant behind the apron (not the front of the gutter) helps stop capillary leaks without making future service a nightmare.
Frequent errors to avoid
- Wrong layering order (the classic leak-maker).
- Skipping drip edge at rakes, saves a few bucks now, costs more later.
- Using thin, flimsy metal that oil-cans and waves.
- Short pieces with tiny overlaps: water finds that joint.
- Misaligned with gutters so runoff overshoots or sneaks behind.
- Cutting corners around dormers and valleys instead of custom-fitting pieces for clean water flow.
One more subtle mistake: not painting or sealing field-cut edges on galvanized steel. That’s a rust starter. To prevent rust, always seal cut edges.
Replacement, Retrofits, and Costs
Can you add it to an existing roof
Yes, often. It’s cleaner to install during a roof replacement, but retrofit is possible. A roofing contractor or roofing professional will gently lift the first course of shingles, slide in a gutter apron or L-style drip edge, and renail. If gutters are in the way, they may need to be temporarily loosened.
On older, brittle shingles or in cold weather, retrofit gets risky, shingles crack. Sometimes the best answer is to stage it with a planned reroof. But if you’ve got water staining behind gutters now, waiting isn’t great either. A site visit tells the tale.
Signs yours needs attention
- Peeling paint or soft wood on fascia, especially near corners.
- Water marks behind the gutter after rain: streaky gutters (the “tiger stripe”).
- Shingle edges lifting or curling at the gable ends.
- Visible gaps where the roof deck edge is exposed.
- Rusted, bent, or missing drip edge pieces, often after a gutter swap. These are signs of damaged drip edge.
Typical price range and what affects cost
During a reroof, adding new aluminum drip edge typically runs about $2–$5 per linear foot installed, depending on metal thickness, color, and roof access. Premium metals like steel or copper bump that up.
Retrofits cost more because of labor and care lifting shingles: roughly $6–$12 per linear foot for aluminum in many markets, higher if gutters must be removed and reset or if steep slopes and multiple stories complicate staging. Copper or custom-bent profiles can reach $15–$25 per foot. This includes drip edge replacement costs.
Pricing swings with region, pitch, and season. Material costs have been volatile the past few years, and labor varies: always get a written estimate with the drip edge profile and thickness specified.
Care and Troubleshooting
Seasonal checks
A quick look goes a long way. In spring and fall, walk the perimeter. Are the drip edges straight? Any gaps where animals could try their luck? Clean the gutters so water doesn’t back up and test a few sections with a garden hose to make sure water lands inside the gutters, not behind them.
In snowy regions, check for ice lines or icicles forming behind gutters, that hints at either gutter clogs, poor insulation/ventilation, or an edge detail that needs help.
Fixing loose or rusted sections
Small issues are fixable. If a short run is loose, renail into solid deck and seal the overlap with a thin bead of compatible sealant. For rust on steel, sand lightly, prime, and paint, or replace the section if corrosion is advanced. Replace distorted pieces rather than trying to pound them flat: wavy edges don’t shed water predictably.
With aluminum, dents happen. Cosmetic dings may be fine, but if the hem is bent open and water can cling back to the fascia, swap it out.
When to call a pro
If shingles need to be lifted, if gutters must come down, or if you see widespread fascia rot, call a roofer. They’ll also spot the upstream causes (poor ventilation, missing ice barrier, mis-pitched gutters) and fix the whole chain rather than just the symptom.
For reference details and best practices, trade groups like NRCA and SMACNA publish flashing standards used by pros: https://www.smacna.org
Conclusion
For something most people never notice from the curb, a drip edge does a surprising amount of heavy lifting. It kicks water away, protects the fascia and deck, partners with gutters, and gives shingles a firm, tidy edge to rest on. Codes require it because experience taught the lesson the hard way.
If they’re planning a roofing project or wrestling with mysterious fascia stains, adding or upgrading the drip edge is a small line item with a big payoff. Choose the right profile (Type D on rakes is a favorite, Type F over gutters is clutch), match the metal to the climate, and get the layering right. That’s it. Simple piece, big result.
And if they’re still unsure what’s happening at those edges, snap a few photos under the eaves after a rain. Where the water tracks, the fix follows. A good roofer will see it in one glance and make it right.
Frequently Asked Questions about Roof Drip Edge
What is roof drip edge and why is it important
A roof drip edge is a thin metal flashing at the eaves and rakes that kicks water away from the fascia and into gutters. It stops capillary creep under shingles, protects the roof deck and siding from rot, improves gutter performance, and helps resist wind-driven rain and ice-dam intrusion.
Where should drip edge go—eaves vs. rakes—and how should it layer with underlayment and gutters
Install drip edge at both eaves and rakes. At eaves: ice barrier (in cold zones), then drip edge, then underlayment over the metal. At rakes: underlayment first, then drip edge on top. With gutters, a Type F gutter apron should bridge into the gutter so runoff can’t sneak behind.
Which roof drip edge type should I choose: Type C, Type D, or Type F
Type C (L-style) is a simple, budget-friendly choice for general eaves and rakes. Type D (T-style) throws water farther and is favored on windy gable ends. Type F (gutter apron) extends into the gutter, ideal when gutters sit forward of the fascia or water overshoots in heavy rain.
Is a roof drip edge required by building code, and what are the minimum specs
In most IRC jurisdictions, drip edge is required at eaves and gables for asphalt shingles. Typical minimums: 0.019-inch metal, 2-inch roof leg, at least 1/4-inch drop below the deck, and 2-inch overlaps. Layer underlayment over the eave drip edge and beneath the rake drip edge.
Do metal roofs need a drip edge, or is trim enough
Metal roofs still benefit from edge metal. Many systems use dedicated eave and gable trims that serve the same purpose as a drip edge: shedding water clear of fascia and sealing panel edges. Local codes and manufacturer details usually require these trims; follow the specific metal roof system’s instructions.
How long does a roof drip edge last, and what maintenance helps
Aluminum or galvanized steel drip edges commonly last decades; thicker gauges and better coatings extend life. Copper can last much longer. Maintain by cleaning gutters, checking each spring and fall for loose sections, gaps, dents, or rust, and touching up cut steel edges. Replace bent or corroded pieces promptly.
Matej Mikula is a Porrentruy-based master roofer specializing in sustainable roofing installations and repairs for residential and commercial properties across Switzerland.
Recent Post